Tuesday, 25 October 2016

research week 9

My research for this week is back on pinterest related to eye stuff and I found this pretty cool way to amp up eyes.


So i tried doing this on my own.


It turned out to be alot harder  than i thought it would be I didn't quite get the colours right that I should have plus i was working with a strange shade of blue eye to start with. I need more practice with this. but I will use this eye for a practice anyway with a silhouette over it to see how it looks and if it is positively looking great i will considering useing this. I was thinking that this would look truely awesome with some light painting done over it.

This lead me to look at more eye photos  that had been photoshoped as well......


I found this one and i truely loved how it looks and if you look closely it has silhouettes ( small ones)
this makes me want to try and photo shop and eye with a black and white background but the eye part in colour. this lead me to looking at photos with eye make up on such as the ones beneath, the make up and eye colour are in colour but the rest is in black and white which is also very effective as well. more Ideas.


Monday 3rd October

whooo back to school after a two week break. It is good to be back I didn't get much photography practice done in the holidays as I would have liked I went to the zoo with stephanie, crystal and samantha I was planning to do lots there for practice but it did rain all day and I didn't want my camera to get wet so I left it in its bag, we also went on a trip with dorothy so she can get her own DSLR camera. but I forgot my camera for that as well. Other wise we were busy most of the holidays and inbetween i was catching up on some sleep.

But for class today we are looking more into lighting and how to use it, and lighting equipment, such as diffusers and reflectors.

we had a look at some lighting tools online to see how to set up lighting.

http://www.cambridgeincolour.com/tutorials/portrait-lighting.htm


We had a look at many examples in class about lighting. These are some screenshots from blinkblog, blog. 


We then were set a task: 


For my black on black i used a camera bag with a black back drop, For each shot I took for this I changed the exposure to darker each time to see what it would look like almost indiscernable. 


This was the best I could think of for white on white to start with, Stephanie volunteered her hands for this. 


Direct

Reflected.

Diffused 


In the afternoon we were back in the computer suites looking at more photoshop things to do. We had a look at blending photos and making actions. i was pretty groggy by the afternoon so i was being pretty slow and by the time it came to creating actions i was still trying to blend two photos and I ended up using google to help me out with the blending as well. 


Monday 12th september. Day of presentation - -- - Research

I tried to get in as early as I could to do my presentation because I was really nervous, I was also very tired because I hadn't slept yet mainly because I was so nervous about the presentation and also I was finishing of my presentation. When it came to watching other peoples presentation I was pretty amazed at how cool their projects were, I was also kind of jealous of how well they were presenting as well because they seemed very calm and collected. When I was presenting i found it hard to talk, my heart was beating hard and it seemed stupid what I had to present and my research compared to others. but I also didn't hear the timer going off either so i was panicking that I didn't have enough to present. I was so relieved when I got to sit down again. I didn't get to see many other presentations after mine because Dorothy had a little break down in class so I went to sit with her to make sure she was ok, I was really worried about her. i hadn't realised what she was feeling, which makes me feel partly responsible for encouraging her to come out with me. but She was crying happy tears as well but I well be there for her in future if she ever needs the extra support. After sitting with Dory for an hour or so me and steph left to go home as we were both really tired.

I was bummed that I couldnt get a poster printed in time for this seminar but there wasn't enough time for me to send to printer and get it back so I well try to do this early next term. but i found a decent printer service to consider.


they have been very helpful with discussing my needs over email. So I am planning on using them. I did look into printing here at school but they only offer black and white poster type prints and I dont want black and white prints, the images are already lacking alot of colour so i want to retain as much as i can.

The problem with my photo though is that even though the images we shot in raw mode the file size of the image will only just go up to A2 size. So i will flow with that for now.

While looking through some images to help solve a graphic design problem i came across light painting and I found some pretty cool ones, I also don't know where these images orignate from and I do realise I need to look up artists more often.


Even though this isn't silhouette photos I thought that perhaps on one or two of the photos that I start editing it would be a nice change to have one or two that is different, I would use it as a last one though. I am still looking through poems though. 

Research Saturday 10th September. Moments Captured

This blog is the research for my seminar/presentation monday. In print media We are making books at the moment and while I was making my book I thought that it would be interesting to make a book from the photos that I am making, added with a poem, (Samantha is going to help me look for some cool poems to do with eyes. I am now thinking about making a book for my final project. I was also talking to stephanie who showed me a site (snapfish.co.nz) which is where you can design your own book online and have it printed professionally and sent to you, which would look alot nicer than if i handmade it.

I had a look through pinterest for examples of my project, but i couldn't find a photo that shows what i want to do, so instead here are examples of Silhouettes that I want to try and do. I don't know the artists who made these or when they were done.


These are examples of the type of eye photos that I want to take.


I started my book of with a poem that I had found suitabe for what I am doing.

Eyes are the windows to our souls by katrina vella

Eyes are the windows to our soul
Reflecting the spirits within
An opening to the wonder of life
From the depths and layers of humanity

Eyes reflect the mystical beings we are 
Like the moon and stars in the cosmos
Our souls take flight on angels wings 
Around the heavens on a celestial journey 

Crying tears of silver glass
Eyes water through sadness and joy
Portraying emotions from the depths 
That rise and fall like the waves on a shore 

Eyes are a Symphony of colour
Which every soul is attracted to
They are connected by the string of life 
Held together by the gravity of nature

Like a mirror our eyes reflect who we are
Souls that wonder this earth 
Like a candle in the mist 
They will always show our spiritual light. 

I think that poem says it all honestly but I carried on to why I like photography 

I have always been fascinated with taking photos. I always loved taking photos of when I am out with my friends. Its a way of recording memories and showing people what I see. I have always been obsessed with capturing special moments and emotions and seeing people react to these photos. Being at school learning to collaborating with other students have made me realise how much I love to work with other people. Which emphasises why building relationship are important. 

I  love photography because it into duces me to new people and it inspires me to go out more often and enjoy more adventures plus I can do photography where ever I go

Photography helps me to remember what I easily forget and it shows that I have a past and I show people that. 

Which brings me to this photography project I want to show everyone the value of treasuring what is important to them.

A brief bit of research about eyes:

"eyes are the window to your soul"
This is why I choose eyes as the foundation. Eyes are linked to a person's emotions, it has been scientifically proven that eyes can show more that 55% of thoughts and emotions, that we can recognise, we can recognise truth and lies, also someones intentions, wishes, fears, self-confidences.....

Some experts even say that the eyes are the mirror of reason and love and that in their expressions a lot can be revealed without a word being spoken.

Moving on to silhouettes:

One of the reason's that I love silhouettes photography is that it can portray a powerful message without needing any complicated or messy detailed image to show it. Silhouette photography is an amazing way to show drama, mystery, emotion and mood in a single image.

Silhouettes have a long history, having many different names such as, "profiles". Which was a style where a person had the outline or "profiles" carved and printed to be sent home from the wars to families. which became a romantic symbol, still recognised today.

Silhouettes can be anything. including a pet or important objects or plant life's. and they all look amazing.

For my final project I want to incorporate the emotional pull from the eye, alluring people to look closer at the image to see the image hidden, the hidden message in the eye portrayed by the silhouette. hopefully the viewer will take their own message away. I intend to do this by using a macro lens and getting volunteers through my friends and school. I am hoping to get a lot variations. I want to incorporate what is important to my models to make this project more personal and to give it more meaning as every one is different with different values. i'll double expose these images together in photoshop for the final project.


Monday, 24 October 2016

Monday 5th September 2016


Good day.

This morning we started off with rudolph singing a family song and moving on we were looking through what we have learnt so far and what we are learning today. Which is Line Colour and Texture.


Lines. 

I am using this photo as an example of vertical lines, as Dorothy is standing straight, in between straight lines. This feels like I could have brightened the lighting in this shot.

Camera settings:
ISO: 400
Aperture: 6.3
Shutter Speed1/100 


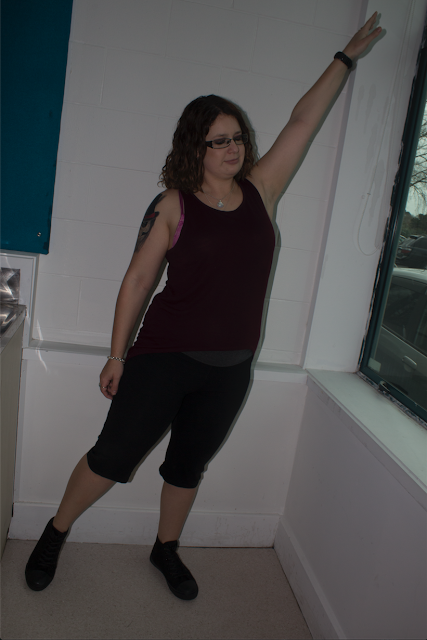
My Diagonal line, Using Sam's arm and leg, to reach out to the corners. lso wish I had more light for this photo, as I was only using my camera's flash for this, but I love that there is a small harsh shadow on Sam's side.  

Camera settings:
ISO: 200
Aperture: 14.0
Shutter Speed: 1/160

My horizontal lines. 

Camera Settings:
ISO: 400
Aperture: 6.3
Shutter Speed: 1/100


I like that the background is slightly blurred. I am using this for one of the contrasting colours, between their shirts. 

Camera Setttings: 
ISO: 400
Aperture: 6.3
Shutter Speed: 1/100


I like the contrasting colours in this one, the colours compliment each other, I dont like the expression on Stephanies face because she looks like she is in pain, which probably means I said something stupid at the time of taking the photo. 

Camera Settings:
ISO: 200
Aperture: 5.6
Shutter Speed: 1/80


I did this one for the reduced colours, I didn't realise how out of focus this picture was on the small screen. which makes it hard to look at. 

Camera Settings:
ISO: 400
Aperture: 6.3
Shutter Speed: 1/100

I did this one for reduced colours as well, but is also very out of focus as well. So it was a fail for me for reduced colours. 


I like the colour difference for this photo, This is for the texture.

Camera settings:
ISO: 400
Aperture: 6.3
Shutter Speed: 1/100


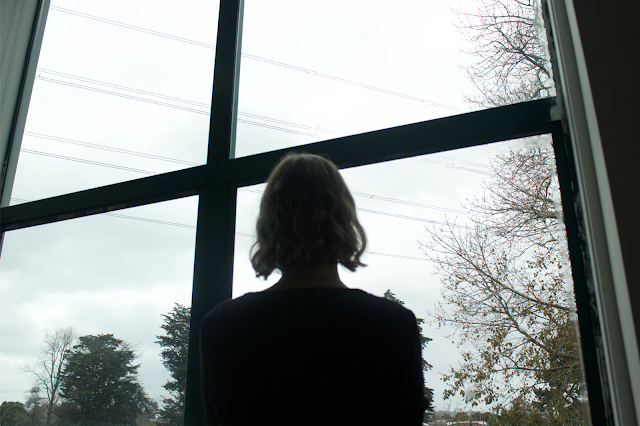
After completing  the class tasks I went to Marie for advice about making silhouette photography for my class project. So we had a little practice for it. The best way to take these photos is to have access to a large portion of the sky so like at a beach or an open field, also to have the sun behind the subject. Since we are aiming for a black out figure it is ok to have the images more under exposed than general, which will give more details to the back ground and in the sky.


Camera Settings:
ISO:100
Aperture: 5.0
Shutter Speed: 1/320


I started under exposing this one more further and it does look better already, particularly with the clouds. 

Camera Settings:
ISO: 100
Aperture: 5.0
Shutter Speed: 1/1250

I was just experimenting with underexposing the outside with these last two images. 

Camera Settings:
ISO: 100
Aperture: 5.0
Shutter Speed: 1250


This one looks like it is about to be a huge storm.

Camera Settings:
ISO: 100
Aperture: 5.6
Shutter Speed: 2500


I started with this photo in the afternoon to start editing because of how dark it is and I thought that I could also start adding to this in the background. but I only ended up doing the basic editings shown below.


After Marie had shown us the afternoon's session in photoshop I grabbed her for help on getting my practice on my first eye to see how it would look before the presentation next week. I did a little retouching of the photo with just the eye I took some of the makeup mess away and some blemishes but in future, I will keep the blemishes in because I think that they add more character to the photo.


I selected one of the Silhouettes that I did with Marie earlier as one of the practices as well. We created a separate layer to work on then dragged the image onto the eye shaping it using the erase tool and then we changed the opacity of the image and then used the eraser tool again to soften the edges of the silhouette. which basically did it.


Marie and I discussed how I would present these artworks at the end of semester, and we thought that it would make quite a big statement if i blew it up to A0 or A1 and we talked about possibly getting it printed for the presentation next week. 

Thanks for reading.